(Last update of this topic: 09-02-2024)
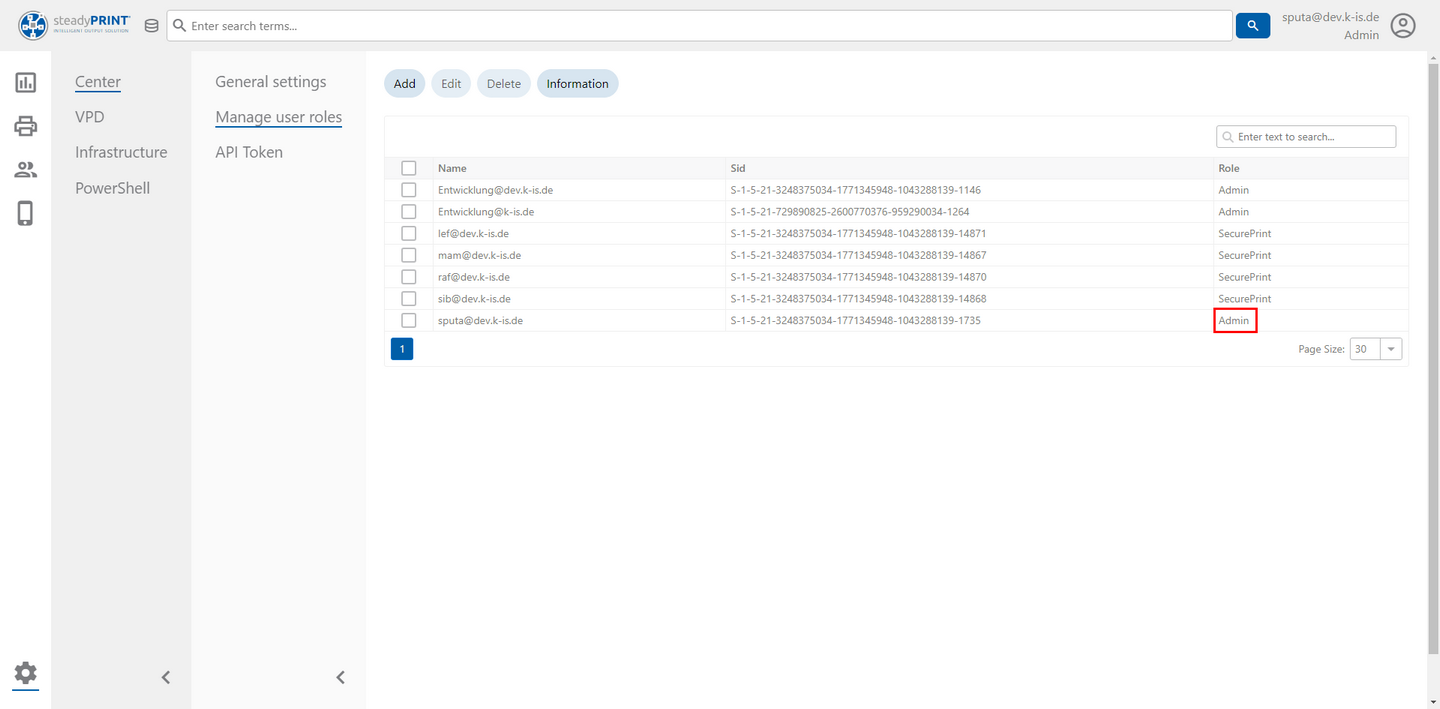
In order to set up users for SecurePrint, you have to switch to the steadyPRINT WebCenter. Here, the roles for the SecurePrint users must be defined. For this purpose, the user changes to the settings and then to the administration of roles. Here, the desired users are already listed, in case they have already tried to log in, or the user creates a new user via the plus icon. SecurePrint users have to have the role: Admin oder SecurePrint besitzen.

Figure 89: WebCenter Role Administration
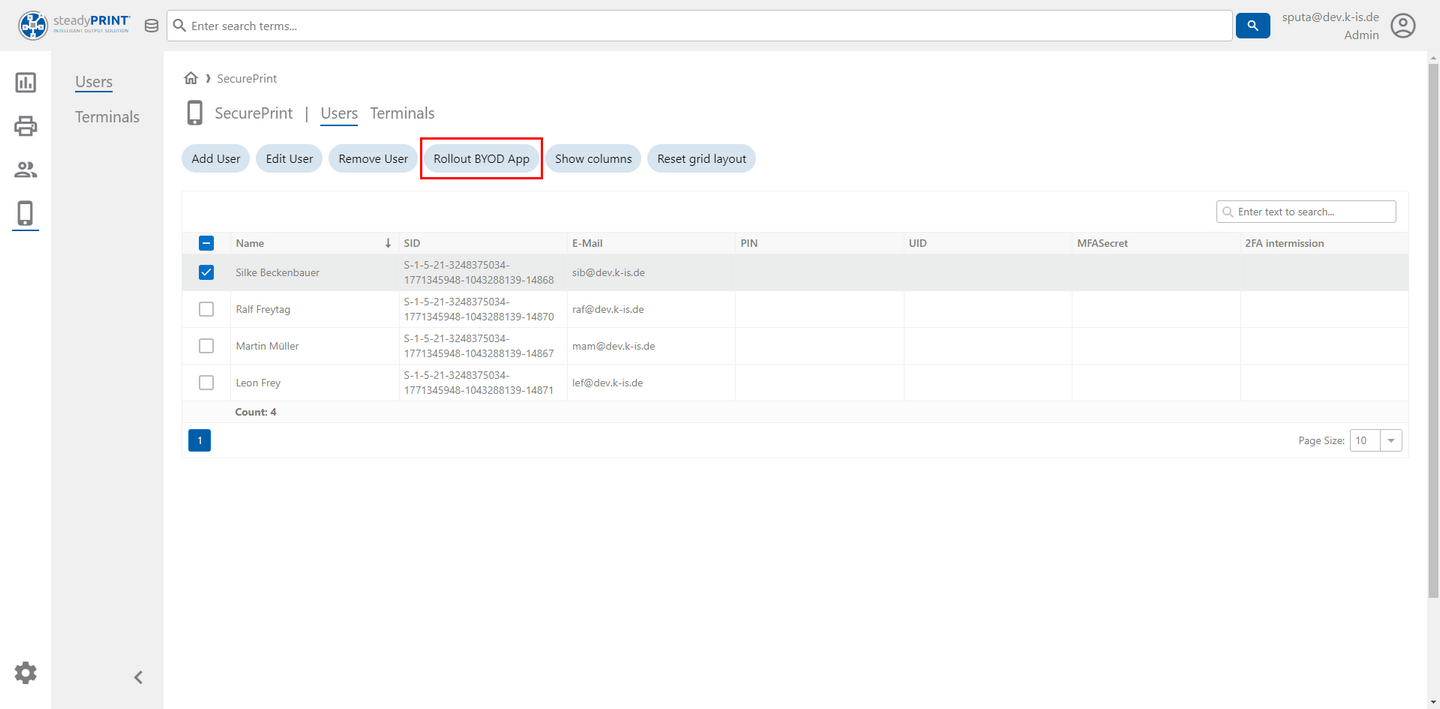
If a user has the role provided for SecurePrint, he will be found under the menu item SecurePrint => user. New users can be added from the Active Directory under Add user. Here, the user can also be adjusted or certain settings can be reset, as e.g. a blocked PIN which can be unblocked here after three invalid entries. Moreover, the link to the SecurePrint App can be forwarded to the user by e-mail via the Action button. This is done by selecting the user and clicking the link Roll out BYOD-App.

Figure 90: WebCenter - Create SecurePrint User
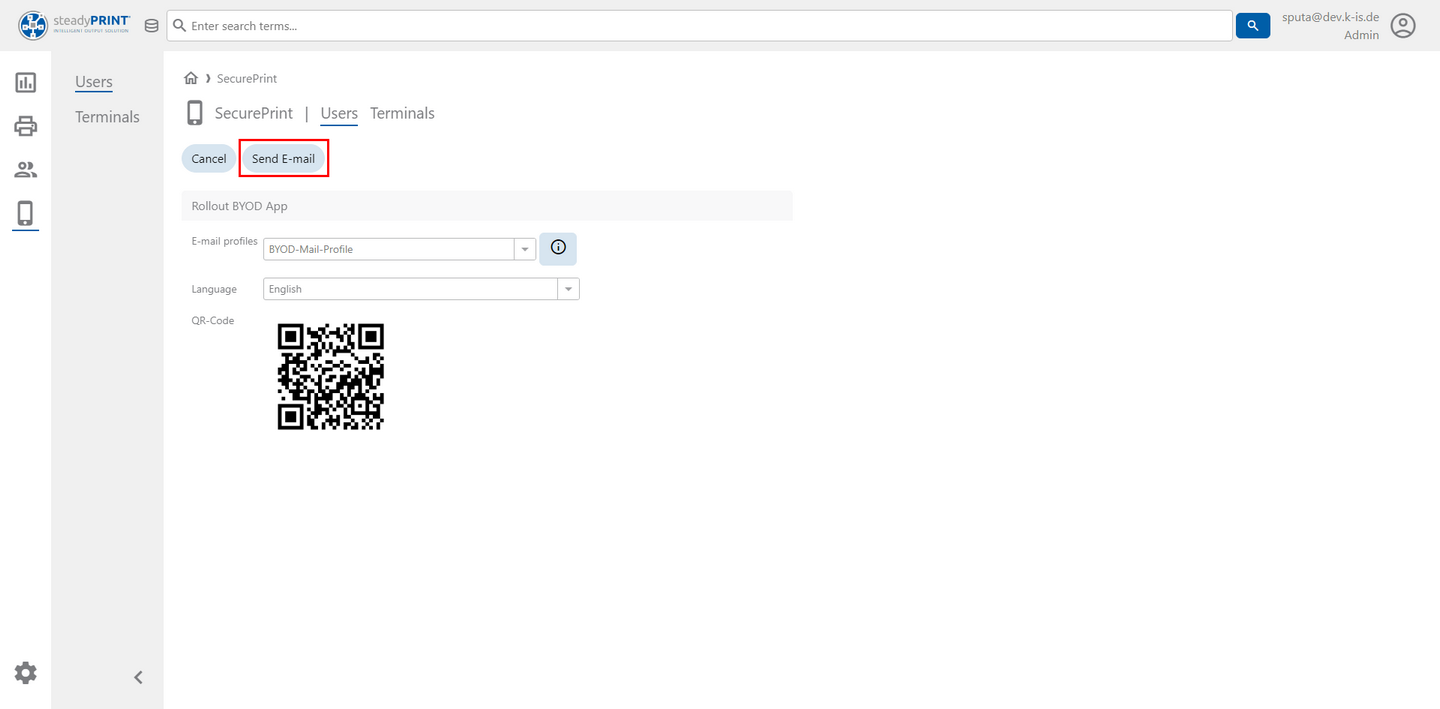
By selecting the stored e-mail profile (see chapter: E-Mail Profiles), a corresponding e-mail will be forwarded to the user.

Figure 91: WebCenter - Distribute SecurePrint App
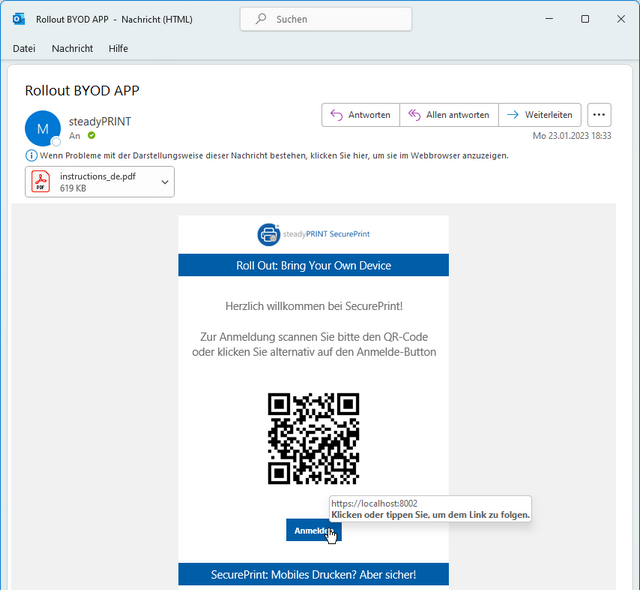
This e-mail is as follows and by clicking the link or scanning the QR code with your smart phone, the correct URL to the hosted SecurePrint App will be accessed.

Figure 92: WebCenter - SecurePrint App Rollout Mail