Register steadyPRINT in Microsoft Entra ID(Last update of this topic: 04-10-2025) |
  
|
(Last update of this topic: 04-10-2025)
Register steadyPRINT in Microsoft Entra ID(Last update of this topic: 04-10-2025) |
|
In this guide you will learn how to register steadyPRINT in Microsoft Entra ID. This process is important in order to create a position of trust between steadyPRINT and the Microsoft Identity Platform. Moreover you will learn how to activate the identity and access management (IAM) for steadyPRINT enabling the secure interaction with Microsoft services and APIs.
Registration of an application
The registration of steadyPRINT in Microsoft Entra creates a relationship of trust between the steadyPRINT API and the Microsoft Identity Platform.
Carry out the following steps to complete the registration of the app (see figure Microsoft Entra - Registration of application):
1. Register at the Microsoft Entra Admin Center at least as an application developer.
2. If you have access to several clients, use the settings icon in the top menu to switch to the client with whom you want to register the application.
3. Navigate to Identity > Applications > Register App and select New registration.
4. Enter a descriptive name for steadyPRINT, e.g. steadyPRINT API. App users can see this name and change it at any time.
5. Navigate to Supported account types and specify who will be allowed to use the application.
6. Select Register in order to complete the App registration.
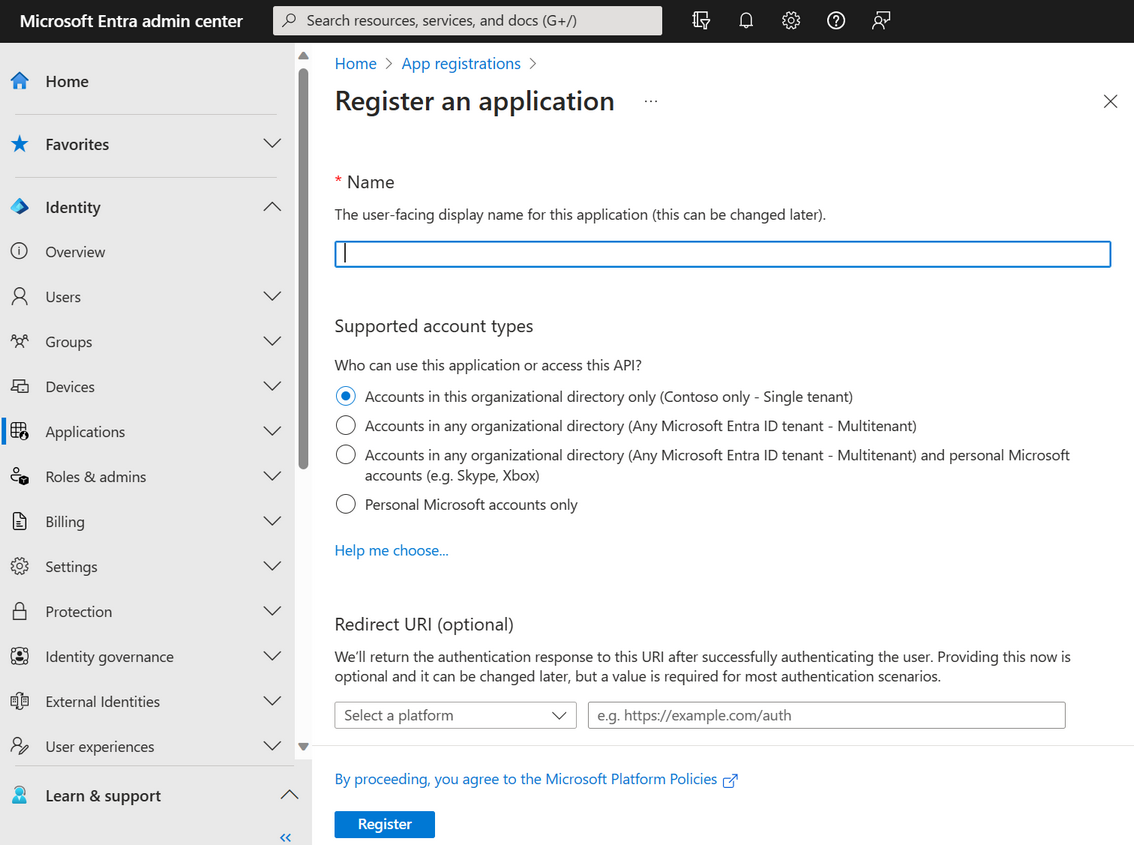
Figure 13: Microsoft Entra - Registration of application
7. The overview page of the application is displayed (see figure Microsoft Entra - Application Overview). Note down the Application (client) ID and Directory (tenant) ID. These will be required later for the connection in the steadyPRINT WebCenter.
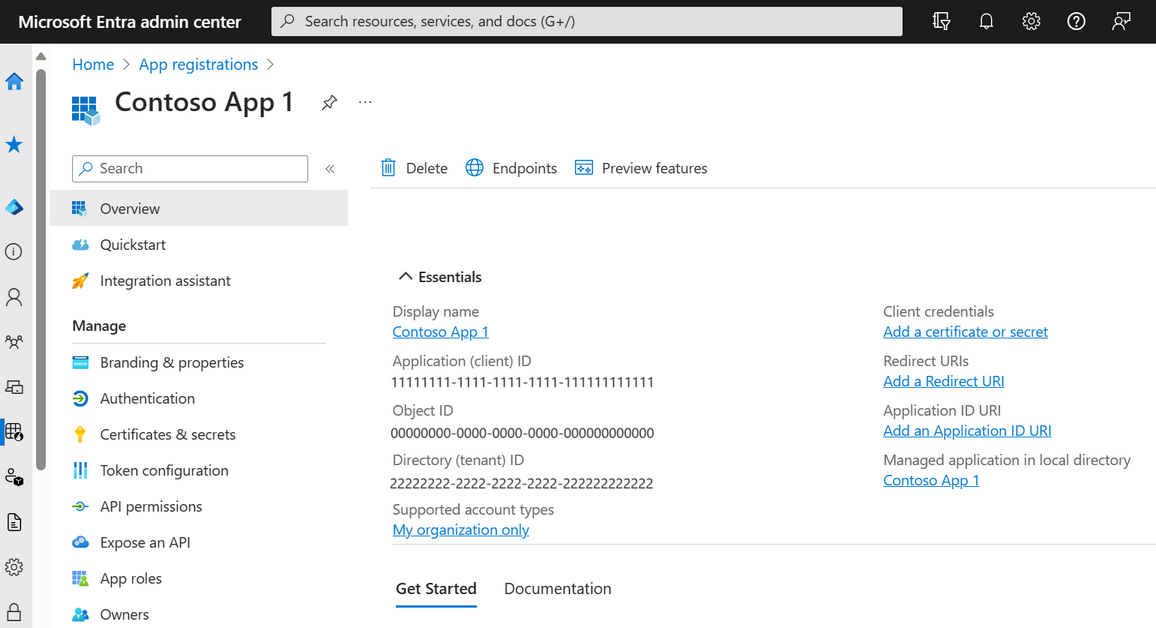
Figure 14: Microsoft Entra - Application overview
Add registration information
Having registered the steadyPRINT API, it is now necessary th add a confidential Client App certificate (see figure Microsoft Entra - Adding a certificate). With this registration information, the steadyPRINT API itself is able to authenticate without the need for user interaction at runtime.

Figure 15: Microsoft Entra - Adding a certificate
A certificate, sometimes also referred to as public key or public key, is the recommended registration type as it is considered safer as Client secrets. For this reason steadyPRINT currently only supports the certificate-based authentication. For depositing a certificate, proceed as follows:
| 1. | Select your application in the Microsoft Entra Admin Center under App registrations. |
| 2. | Select Certificates & secrets > Certificates > Upload certificate. |
| 3. | Select the file that you want to upload. It must be one of the following file types: .cer, .pem, .crt. |
| 4. | Select Add. |
In production, you should use a certificate which has been signed by a known certification authority (CA). Note down the Thumbprint of the used certificate. It will be required later when linking in the steadyPRINT WebCenter.
API permissions for access to Microsoft Graph
The steadyPRINT API must have reading access to the data of users, groups and devices stored in Microsoft Entra ID. Configure application permissions for the steadyPRINT API, as it has to authenticate itself without user interaction or consent.
For storing permissions proceed as follows:
1. Navigate to Identity > Applications > App registration and select the application registered under the point Registration of an application.
2. Select API permissions > Add a permission > Microsoft Graph > Application permission.
3. All permissions provided by Microsoft Graph are displayed under Select permissions.
4. Select the following permissions for granting steadyPRINT access to the required resources:
| o | Directory.Real.All |
| o | Domain.Read.All |
| o | Group.Read.All |
| o | GroupMember.Read.All |
| o | Member.Read.Hidden |
| o | User.Read.All |
5. Select Select permissions.
6. The consent of the administrator is required for the permissions. You grant the consent of the administrator by selecting the button Grant admin consent. For an explanation of the administrator consent, see Admin consent button.