(Last update of this topic: 05-22-2015)
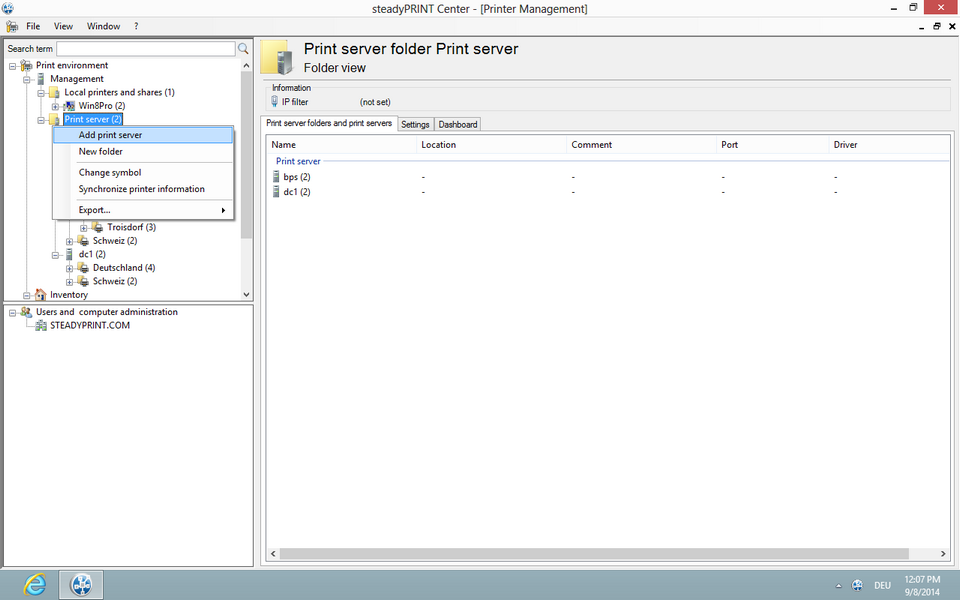
To administer print servers and printers with steadyPRINT, it is first of all necessary to integrate them into the steadyPRINT Center. This is done by using the context menu of the administrative tool’s tree view, Figure - steadyPRINT Center - setting up a new print server via the context menu.

Figure <%HMFIGURECOUNTER%: steadyPRINT Center – setting up a new print server via the context menu
Adding a print server in the required role is done via the tree node Local printers and shares and Print server.
There are currently two print server roles in steadyPRINT (Print Server and Local Print Server). The respective assignment is done during the import via the steadyPRINT Center. A subsequent change is possible via the settings of the respective print server view.
Print Server
This role represents a usual print server. The area of use for this role is the central management, reliability, migration as well as monitoring and reporting of the printing environment.
Local Print Server
A local print server, however, is usually a normal workstation with printer assignments. The installed printers are able to connect users on their computers and to finally use the printing function. This kind of print server is particularly suitable for subsidiaries with only a few workstations. In this role, there are less functions ready to be used by the administrator. Reliability, migration and monitoring and reporting are not yet available.
The primary area of use is the remote administration of printers on remote workstations. It is not necessary for the administrators to open a remote session directly on the computer. The configuration of the printers is directly done via the steadyPRINT Center. A steadyPRINT Agent installed on the workstation subsequently implements the configuration and informs about the installation status. If, for example, the computer cannot be started or is not accessible due to firewall rules, an installation is still possible. Only the access to the steadyPRINT Database must be available on the workstations.
Importing Print Servers and Printers
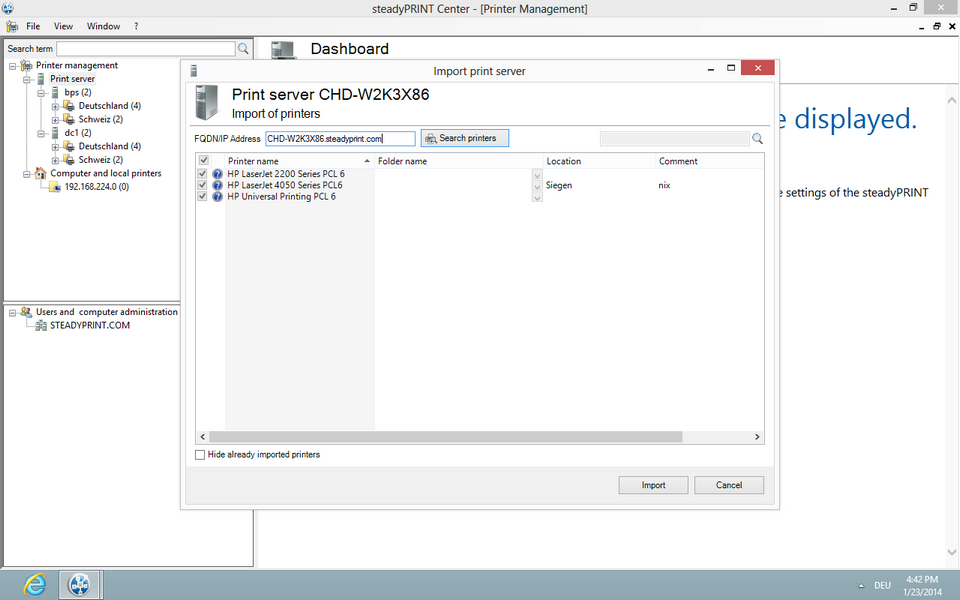
Now the name of a print server is entered in the window seen in Figure - steadyPRINT Center - importing a print server allowing its connected printers to be listed. Disabled print servers can be re-enabled here by entering the name (also see Disabling and Deleting Print Servers).
Note |
Importing a Disabled Print Server from the Database |
|
When importing please note that all existing printer assignments remain set to disabled ("locked") by default in order to avoid accidentally connecting printers to the Clients. Otherwise, these assignments would have a direct impact. |
To administer your printers with steadyPRINT, select them and then continue by clicking on the Import button.
Tip |
Organizing Printers in Folders |
|
Organize your printer environment in a clearly arranged folder structure. This can be done either subsequent to or directly during printer import. |
After completing this action, the new print server with the selected printers appears in the tree view under Printer Administration > Print Server.

Figure <%HMFIGURECOUNTER%: steadyPRINT Center – importing a print server
Note |
Import of Print Servers via CSV File |
|
Importing print servers can also be done via a CSV file. This way, for example, you can simply import your print servers and printers from an inventory to steadyPRINT. This procedure is described in chapter Import of print servers from a CSV file. |
Disabling and Deleting Print Servers
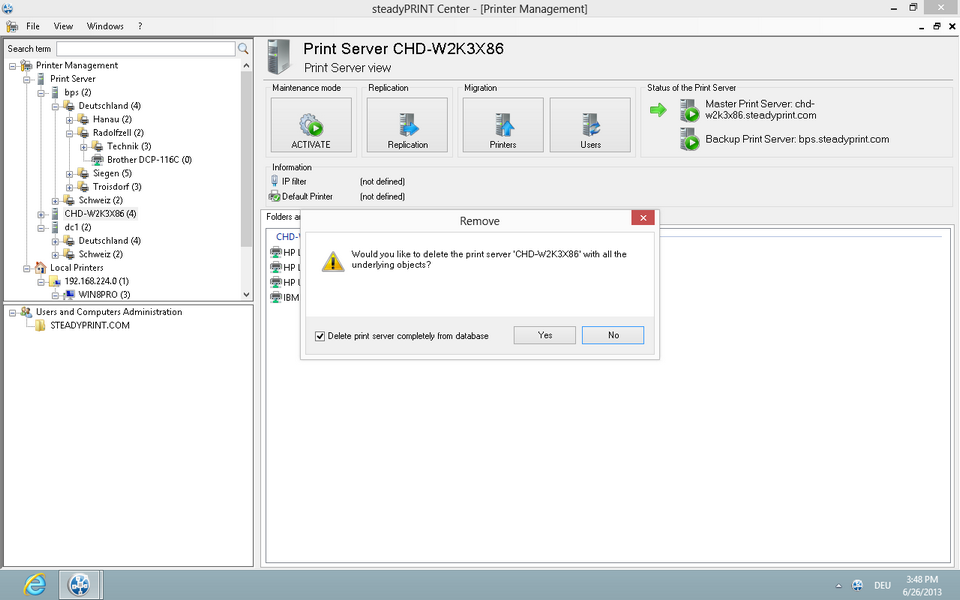
Removing a previously imported print server is possible using the context menu of the corresponding print server. By adding the check mark in Figure - steadyPRINT Center - deleting a print server, you will erase the selected system - with all its printers and their assignments - irrevocably from the database.

Figure <%HMFIGURECOUNTER%: steadyPRINT Center – deleting a print server
Otherwise the print server will merely be disabled - whereby it will subsequently no longer be visible in the steadyPRINT Center. Analog to Importing Print Servers and Printers, you can re-import a disabled print server for subsequent use by entering the name.
Note |
|
|
Please note that only one disabled print server with the same name is allowed in the database. After disabling an additional print server, however, you can overwrite the existing one. |